
This tutorial will show you how to interface your Arduino to a HTU21D humidity and temperature sensor and start taking measurements. Once you’ve got the basics, we’ll take a look at configuring the sensor to optimise its performance. What you’ll need:
- An Arduino or compatible clone
- A HTU21D temperature sensor. I’ll be using one of these from Adafruit.
- Jumper wires
The HTU21D_datasheet says that it only accepts 3.3V signals, therefore you’ll need to ensure that you power the sensor with 3.3V and all signal voltages don’t exceed 3.3V or you’ll damage your sensor. The HTU21D breakout from Adafruit features an integrated 3.3V low dropout regulator which allows you to power it from a 3.3V to 5V source. Additionally, it features level shifting so the sensor’s IO pins don’t exceed 3.3V. Also, the SDA and SCL control lines have their own pullup resistors. To connect your sensor you’ll need to make the following connections.
| Arduino | HTU21D |
|---|---|
| VCC | VIN |
| GND | GND |
| A4 (SDA) | SDA |
| A5 (SCL) | SCL |
Or if you prefer pictures, see below.  Once you’re connected, load up the Arduino IDE and copy the following code into a new sketch.
//Code to read the temperature and humidity from a HTU21D temperature sensor
//Tim Hansen 12/2/15 - www.steelcityelectronics.com
//Protocol: I2C (TWI)
//Specs - Temperature: -40 to 125 degrees Celcius
// - Humidity: 0 to 100% relative humidity
// - Voltage: 3.8VDC max

//What libraries do we need?
#include  //The "Wire.h" library is required to use the I2C commands

//GLOBAL VARIABLES
//Avoid global variables where practical. Global variables consume SRAM as soon as the micro starts. Whereas a local variable declared inside
//a function only consumes SRAM when the function is called.

void RequestMeas(int Address, int CommandCode)
{
 Wire.beginTransmission(Address); // The HTU21D will respond to its address
 Wire.write(CommandCode); // request the measurement, ie temperature or humidity
 Wire.endTransmission();
 return;
}

long ReadMeas(int Address)
{
 //A measurement from the HTU21D is returned in 3 consecutive bytes. See page 11 of the datasheet
 //the order of returend data is: [DATA (Most Sig Byte)], [DATA (Least Sig Byte)], [Checksum]
 //We will ignore the checksum to save computation time and complexity. Page 14 of the datasheet details how to calculate the checksum

 byte DataHIGH; //The location to store the high measurement byte
 byte DataLOW; //The low measurement byte
 byte CRC; //If you want to compute the CRC feel free to do so.

 long Data; //The temporary memory location we are storing our data in as we receive it from the HTU21D
 //Each packet of data is only 8bits in length, but if we do a bit shift we can store the 2 packets of
 //measurement data in a variable. Remember you can only return 1 variable when a function finishes.
 //Ideally, we'd use an int to store the result, however, at high measurement values in 14bit mode, an int overflows.
 //To prevent overflow, we must use a single long (32bits).

 Wire.requestFrom(Address, 3); //We are requesting data from the HTU21D and there will be 3x bytes that must be read.
 while(Wire.available()) // Check for data from the HTU21D
 {
 DataHIGH = Wire.read(); // Read high byte
 DataLOW = Wire.read(); // Read low byte
 CRC = Wire.read(); // Read the CRC byte
 }

 //OK, so now we are going to 'pack' our 2x bytes of data measuremetns into a single int so only 1 variable is returned.
 //To do this, we will use the left bitshift operator '<<'. What this does is push all the bits across to the left.
 //FUN FACT: performing a left bit shift is equivalent to multiplication by 2 for each shift. The reverse is true for right
 //bitshift which is equivalent to dividing by 2. This is a far more efficient method to perform multiply or divide by 2.

 Data = DataHIGH; //The data sits in the low byte of 'int Data'.
 //Ie, Data = [00000000][00000000][00000000][8 bits of DataHIGH]
 Data = Data << 8; //Shift all the bits to the left for 8 bits. The old locations fill with zeros.
 //Ie, Data = [00000000][00000000][8 bits of DataHIGH][00000000]
 Data = Data + DataLOW; //Now simply add the low byte of data to the int.
 //Ie, Data = [00000000][00000000][8 bits of DataHIGH][8 bits of DataLOW]

 return Data; //return our measurement.
}

void setup()
{
 Wire.begin(); // join i2c bus (address optional for master)
 Serial.begin(9600); // start serial for output
}

void loop()
{
 //Set the address of the HTU21D. This detail is hidden at the bototm of page 10 of the datasheet.
 const int I2C_address = 0x40; // I2C write address. Note that 'const' has been declared. If you try to write to this variable
 // anywhere else in your code you'll get a compilation error. This prevents you from doing silly things.

 const int TempCode = 0xE3; // A temperature measurement is executed with this command code. See page 11 of datasheet.
 const int HumidCode = 0xE5; // A humidity measurement is executed with this command code. See page 11 of datasheet.

 long Temperature; //Perform our calculation using LONG to prevent overflow at high measuremetn values when using 14bit mode.
 long Humidity;

 float TemperatureFL; //Variable to store our final calculated temperature measurement
 float HumidityFL;

 delay(100); // a short delay to let everything stabilise

 while(true) // execute all the instructions in this loop forever
 {
 delay(10); //add a small delay to slow things down

 RequestMeas(I2C_address, TempCode); //Request the current temperature
 Temperature = ReadMeas(I2C_address); //read the result

 //We must now convert our temp measurement into an actual proper temperature value
 //According to page 15, the conversion equation is: Temp = -46.85 + 175.72 x TeampMeas / 2^16
 //Becasue the result will have decimal places in the result we must use a Float datatype.
 TemperatureFL = -46.85 + 175.72*(Temperature/pow(2, 16));

 delay(10); //add a small delay to slow things down

 RequestMeas(I2C_address, HumidCode); //Request the current humidity
 Humidity = ReadMeas(I2C_address); //read the result

 //We must now convert our humidity measurement into an actual proper humidity value
 //According to page 15, the conversion equation is: Humidity = 6 + 125 x TeampMeas / 2^16
 //Becasue the result will have decimal places in the result we must use a Float datatype.
 HumidityFL = -6 + 125*(Humidity/pow(2, 16));

 //All the calculations are complete, lets now display our values for temperature and humidity on the serial port.
 Serial.print("Temperature:");
 Serial.print(TemperatureFL);
 Serial.print("\t");
 Serial.print("Humidity:");
 Serial.println(HumidityFL);
 }

 return;
}
Next verify and upload your code to the Arduino. Once complete, open the serial monitor and watch the measurements roll in. 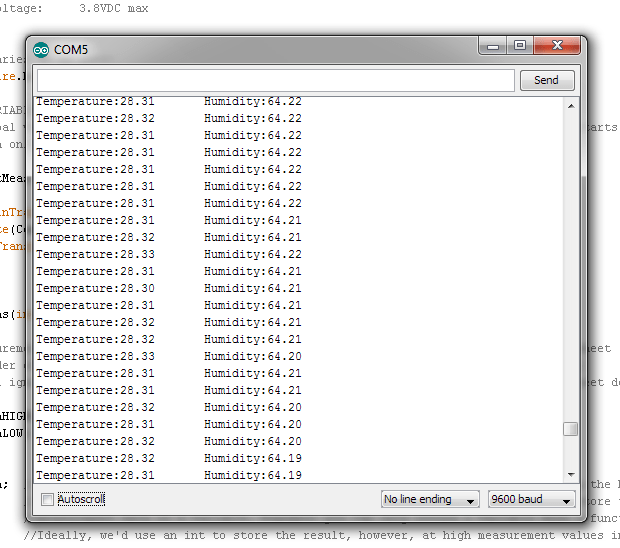 But wait, I don’t relate to Celsius, I only know Kelvin or Fahrenheit. How do read those measurements? Easy! We just use the measurement that has been calculated in Celsius and convert to our new unit of measure. For those who enjoy being absolute about their temperature, all you need to do is add 273.15 to a Celsius reading. So modify your code so it now looks like:
//We must now convert our temp measurement into an actual proper temperature value

//According to page 15, the conversion equation is: Temp = -46.85 + 175.72 x TeampMeas / 2^16
//Becasue the result will have decimal places in the result we must use a Float datatype.
TemperatureFL = -46.85 + 175.72*(Temperature/pow(2, 16));

//--------------NEW
//convert the result to Kelvin
TemperatureFL = TemperatureFL + 273.15;
//--------------NEW

delay(10); //add a small delay to slow things down

RequestMeas(I2C_address, HumidCode); //Request the current humidity
Humidity = ReadMeas(I2C_address); //read the result
Alternatively for Fahrenheit users, you apply the formula, TempF = TempC x 9/5 + 32. Easy as. Modify your code to suit the following.
//We must now convert our temp measurement into an actual proper temperature value

//According to page 15, the conversion equation is: Temp = -46.85 + 175.72 x TeampMeas / 2^16
//Becasue the result will have decimal places in the result we must use a Float datatype.
TemperatureFL = -46.85 + 175.72*(Temperature/pow(2, 16));

//--------------NEW
//convert the result to Fahrenheit
TemperatureFL = (TemperatureFL * 9)/5 + 32;
//--------------NEW

delay(10); //add a small delay to slow things down

RequestMeas(I2C_address, HumidCode); //Request the current humidity
Humidity = ReadMeas(I2C_address); //read the result
Pretty straightforward. Soon, I’ll post details on how to calculate the temperature compensated Relative Humidity value.

Hi, Like your project, anyway, do you know how to interface with TM1637 display?
LikeLike
Hi Patrick,
Thanks for visiting.
No I haven’t used a TM1637 display before, but I’m conifdent that you can easily interface one to this project.
There seems to be quite a support base for this chip/display and I quickly found some good information at http://playground.arduino.cc/Main/TM1637 . You can find a link to a GitHub repository for a library that has been written for the TM1367 display.
I’ve had a very quick look and the library contains a function called ‘showNumberDec()’ that allows you to write an integer value to the display. Note that you’ll need to perform a ‘type conversion’ to translate the temperature and humidity values from a ‘float’ to an ‘int’ – the code above gives you the temperature and humidity as a float. If you’re not familiar with how to perform a type conversion, see the link, https://www.arduino.cc/en/Reference/Cast .
I hope this helps,
Tim
LikeLike
Hi I am new to this what is you want to know what humidity level is in your house, but you want to turn on a Fan once it reaches 75% humidity. is there a way to use a micro controller to make the decision for you by enabling a pin on it?
Thanks
Ray
LikeLike
Hi Ray,
Yes a micro-controller can turn on a relay when the humidity reached a certain value. The code in this tutorial, with some simple additions can do what you want.
In the setup() routine, you need to include a pinMode() function to declare a digital output that would drive your relay. For example, pinMode(relayOutputPin, OUTPUT), where “relayOutputPin” is a declared variable that is equal to the pin number you want to use. Then in the main control loop, you need to perform a simple comparison function that compares the current humidity to the desired humidity, 75%.
For example,
if(HumidityFL >= 75){
digitalWrite(relayOutputPin, HIGH); //When the humidity is equal to or greater than 75% turn on the digital output
}
else{
digitalWrite(relayOutputPin, LOW); //When the humidity is NOT equal to or greater than 75%, turn off the digital output.
}
I hope this helps,
Tim
LikeLike