
For a current project, I needed to cast some electronics in epoxy resin. The process was eventually successful, but it did take 3 attempts to get it right.

The aim was to encapsulate a Neopixel ring and control electronics in epoxy and use this as an underwater macro ring light for my underwater camera.
This blog post is just going to detail the process I used and the mistakes made. Once I finish the ring light, I’ll make post about it.
So, I used some casting resin and a hardener I bought from Bunnings for about $40. The catalyst is mixed into the resin and is to harden the resin.

Instructions on the resin, say that the mold should be made from a “self releasing” plastic like ice-cream container. That got me thinking. I thought that perhaps milk bottle material (high density polyethylene) could be a possible mold plastic because it is difficult to glue. Then, I thought, perhaps the resin won’t stick to PETG filament because it is a type of polyethylene.

1st Attempt – PETG Mold – FAIL
This first attempt literally involved pouring resin straight into a scrapped piece of PETG.

The resin hardened but didn’t release from the mold. It is permanently stuck.
One positive though, the mold didn’t leak resin. The scrapped 3D print I used for the mold only had a single perimeter thickness. This is good to know, because the PETG might be useful for making objects that need to be water tight.
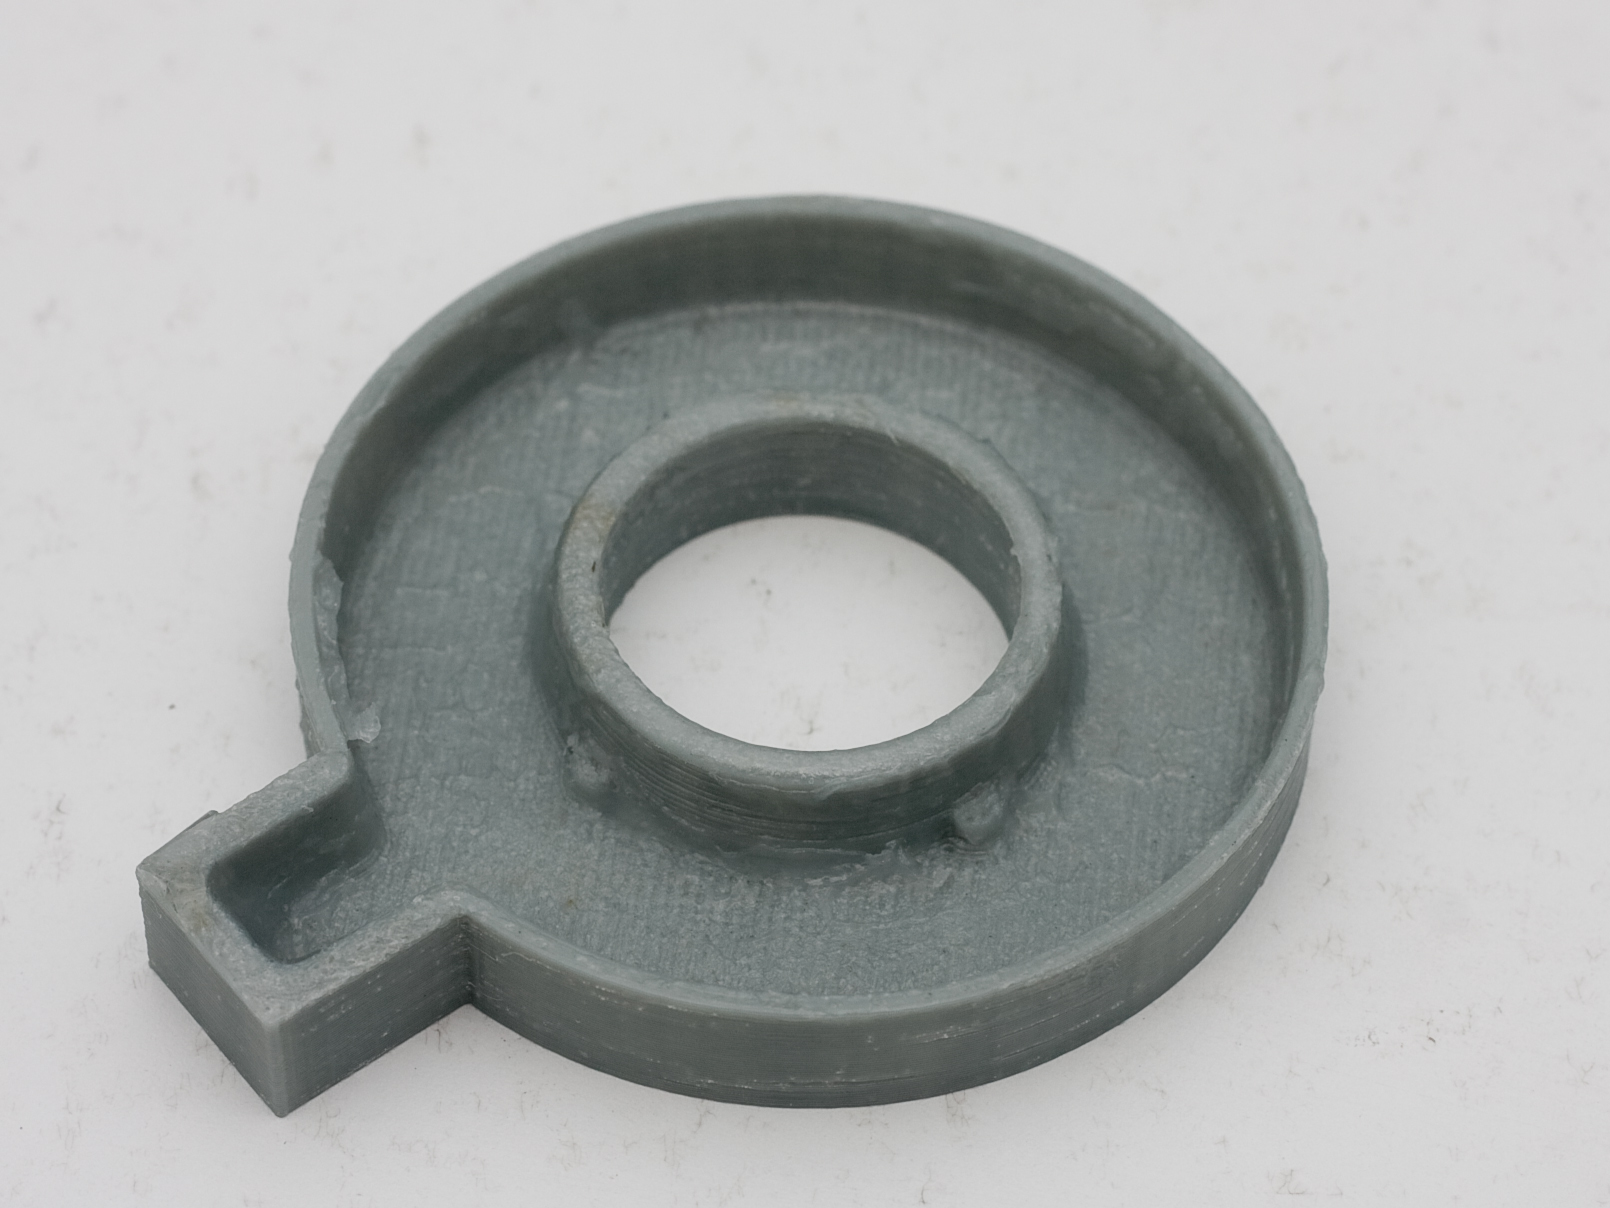
2nd Attempt – PETG Mold and Vaseline – Some Success
Not deterred, I made a mold in the shape required.
Some things to note, I gave the inner walls of the mold an 8 degree draft angle with the idea that this would help release the resin from the mold. All surfaces of the mold were given a thin smear of Vaseline to help prevent the resin adhering to the PETG.
More resin was prepared and poured into the cast.

24hrs later the casting required a flat blade screwdriver to pry it from the mold. It got stuck in some sections where I think the layer of Vaseline was too thin.

3rd Attempt – PETG Mold and Lots of Vaseline – Great Success
Having made some good progress in the 2nd attempt, I went all in and cast the Neopixel ring.
This time however I was very liberal with the Vaseline I applied.
A 3mm layer of resin was cast and given 30 minutes to begin hardening. Then a small layer of resin poured and the Neopixel ring placed into the mold. More resin was carefully poured into the mold and over the Neopixel ring being careful to prevent air bubbles being trapped in the resin.

Very little effort was required to remove the casting from the mold.
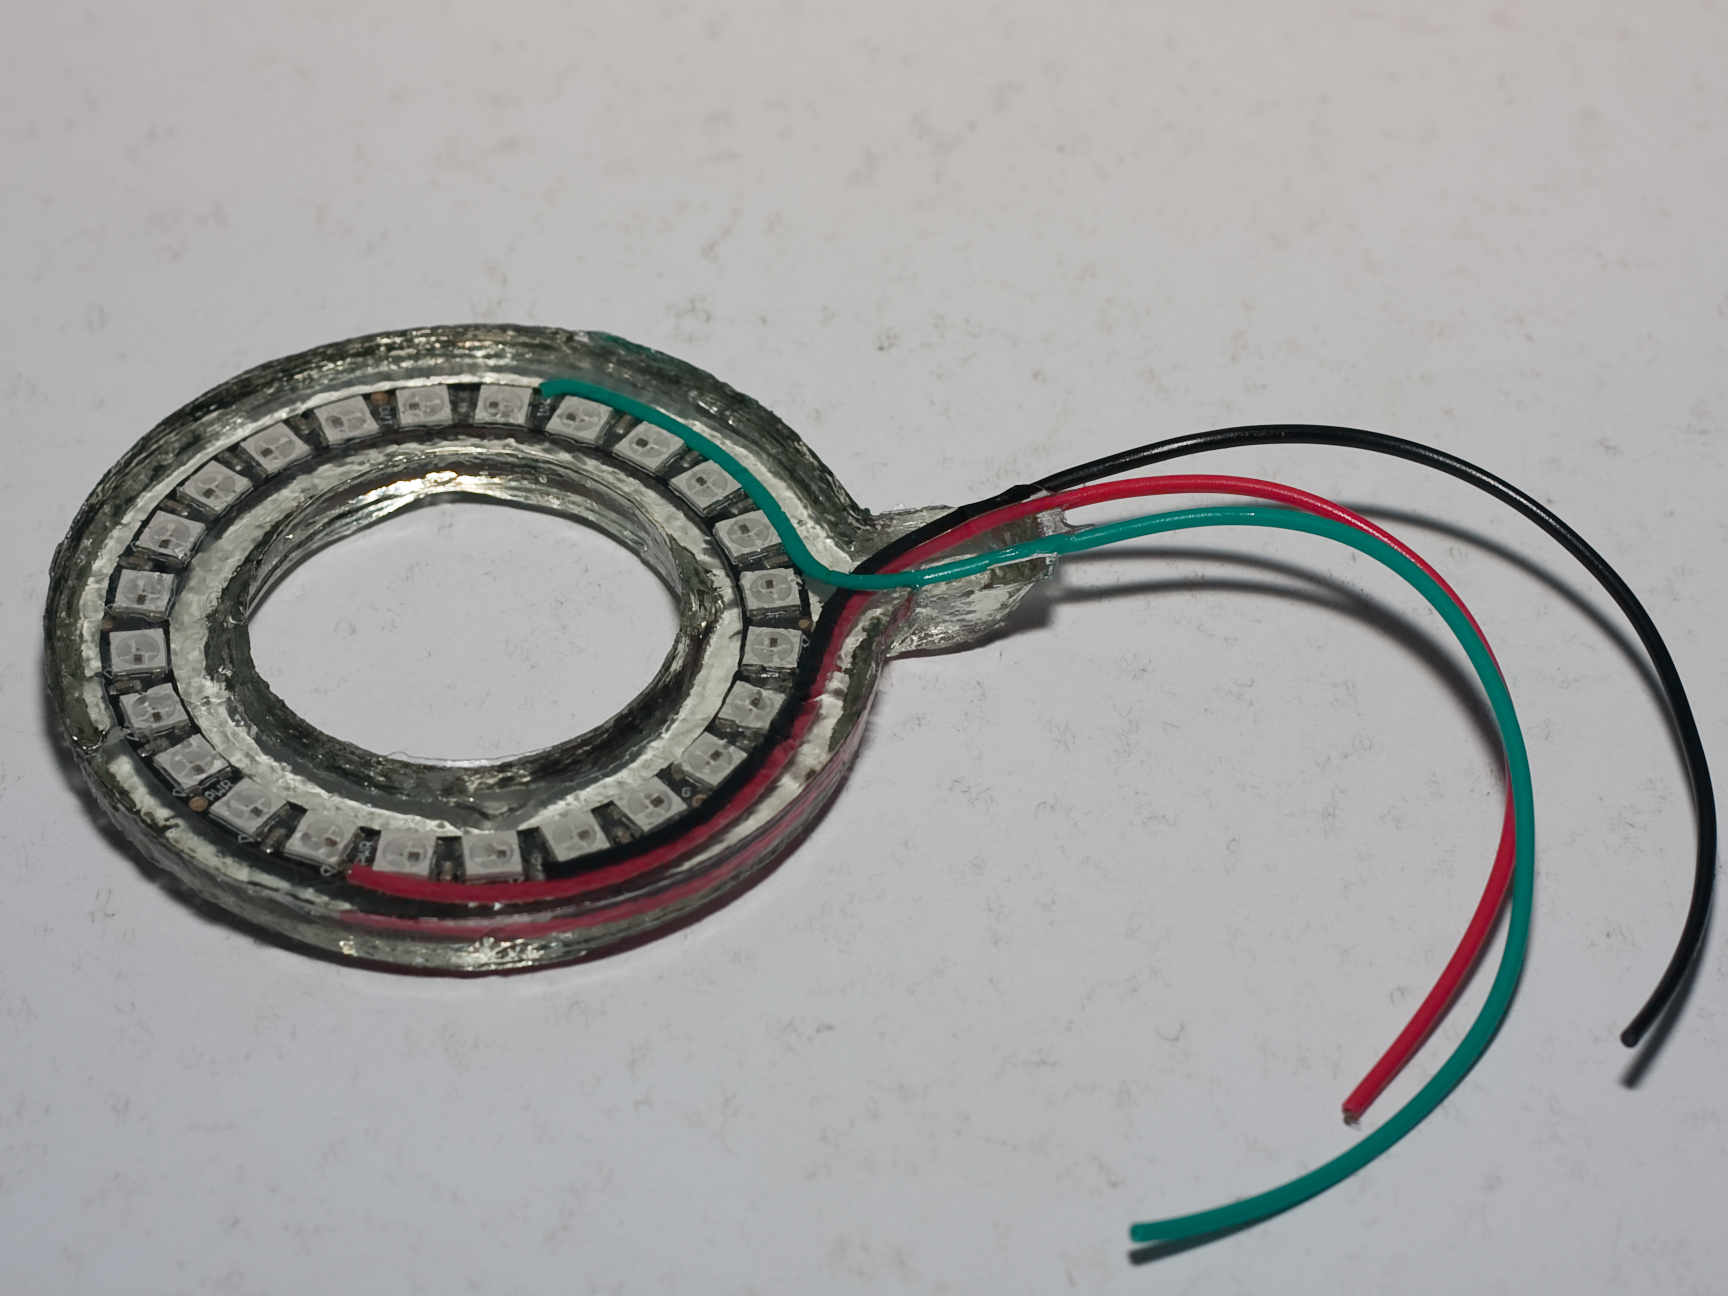
By the way, the electronics are unaffected by the resin.

Thoughts and Advice
- Casting resin is a messy process.
- Make sure you have all the tools you need ready to go.
- Also, work out the volumes of resin and hardener you’ll require so you can work as fast as possible.
- Wear gloves because the stuff gets everywhere.
- Have plenty of disposable rags or paper available.
- Work in a very well ventilated area. The resin smells like cancer.
- Use plenty of Vaseline to lubricate your mold.
