
I recently posted about overhauling a second hand Ikelite underwater camera housing. It was a relatively straightforward job, fiddly at times, but enjoyable. Before I took the housing in the ocean, I wanted to make a custom leash so I could secure the camera to my wrist.
The main purpose of the leash is to prevent the camera floating off (either downwards into a deep abyss or upwards to the surface) if I have to let go of it to use both my hands (or I accidentally let go). However, equally important is that it must be straightforward to release the camera if the situation arises such as a tangle.
So, I set out to make myself a custom leash that was:
- Cheap to make
- Materials used can be immersed in salt water
- Easy to separate myself from the leash
- Bright colour so it can be easily seen
I started out by taking a walk through Bunnings to see if there was some sort of pre-made leash I could buy. If not, I was thinking about some sort of plastic rope or webbing.
I didn’t find a pre-made leash, but I got looking at the polyester webbing. 10m of 25mm wide plastic webbing was reasonably cheap, but what surprised me was the vast array of different connectors and accessories to suit the polyester webbing, and they were all really cheap. Like a few dollars per packet.

All sorts or accessories were available; clips, swivel shackles, d-rings made form plastic or metal, tensioners and more. I reckon I’ll be using this stuff more in the future.
Anyway, what I ended up getting was the following:
- 10m of 25mm yellow polyester webbing – $6.50
- 2x metal swivel hooks for 25mm webbing – $2.00
- 2x 25mm double adjustable clips – $1.30
- 4x 25mm webbing slides/tensioners – $1.17
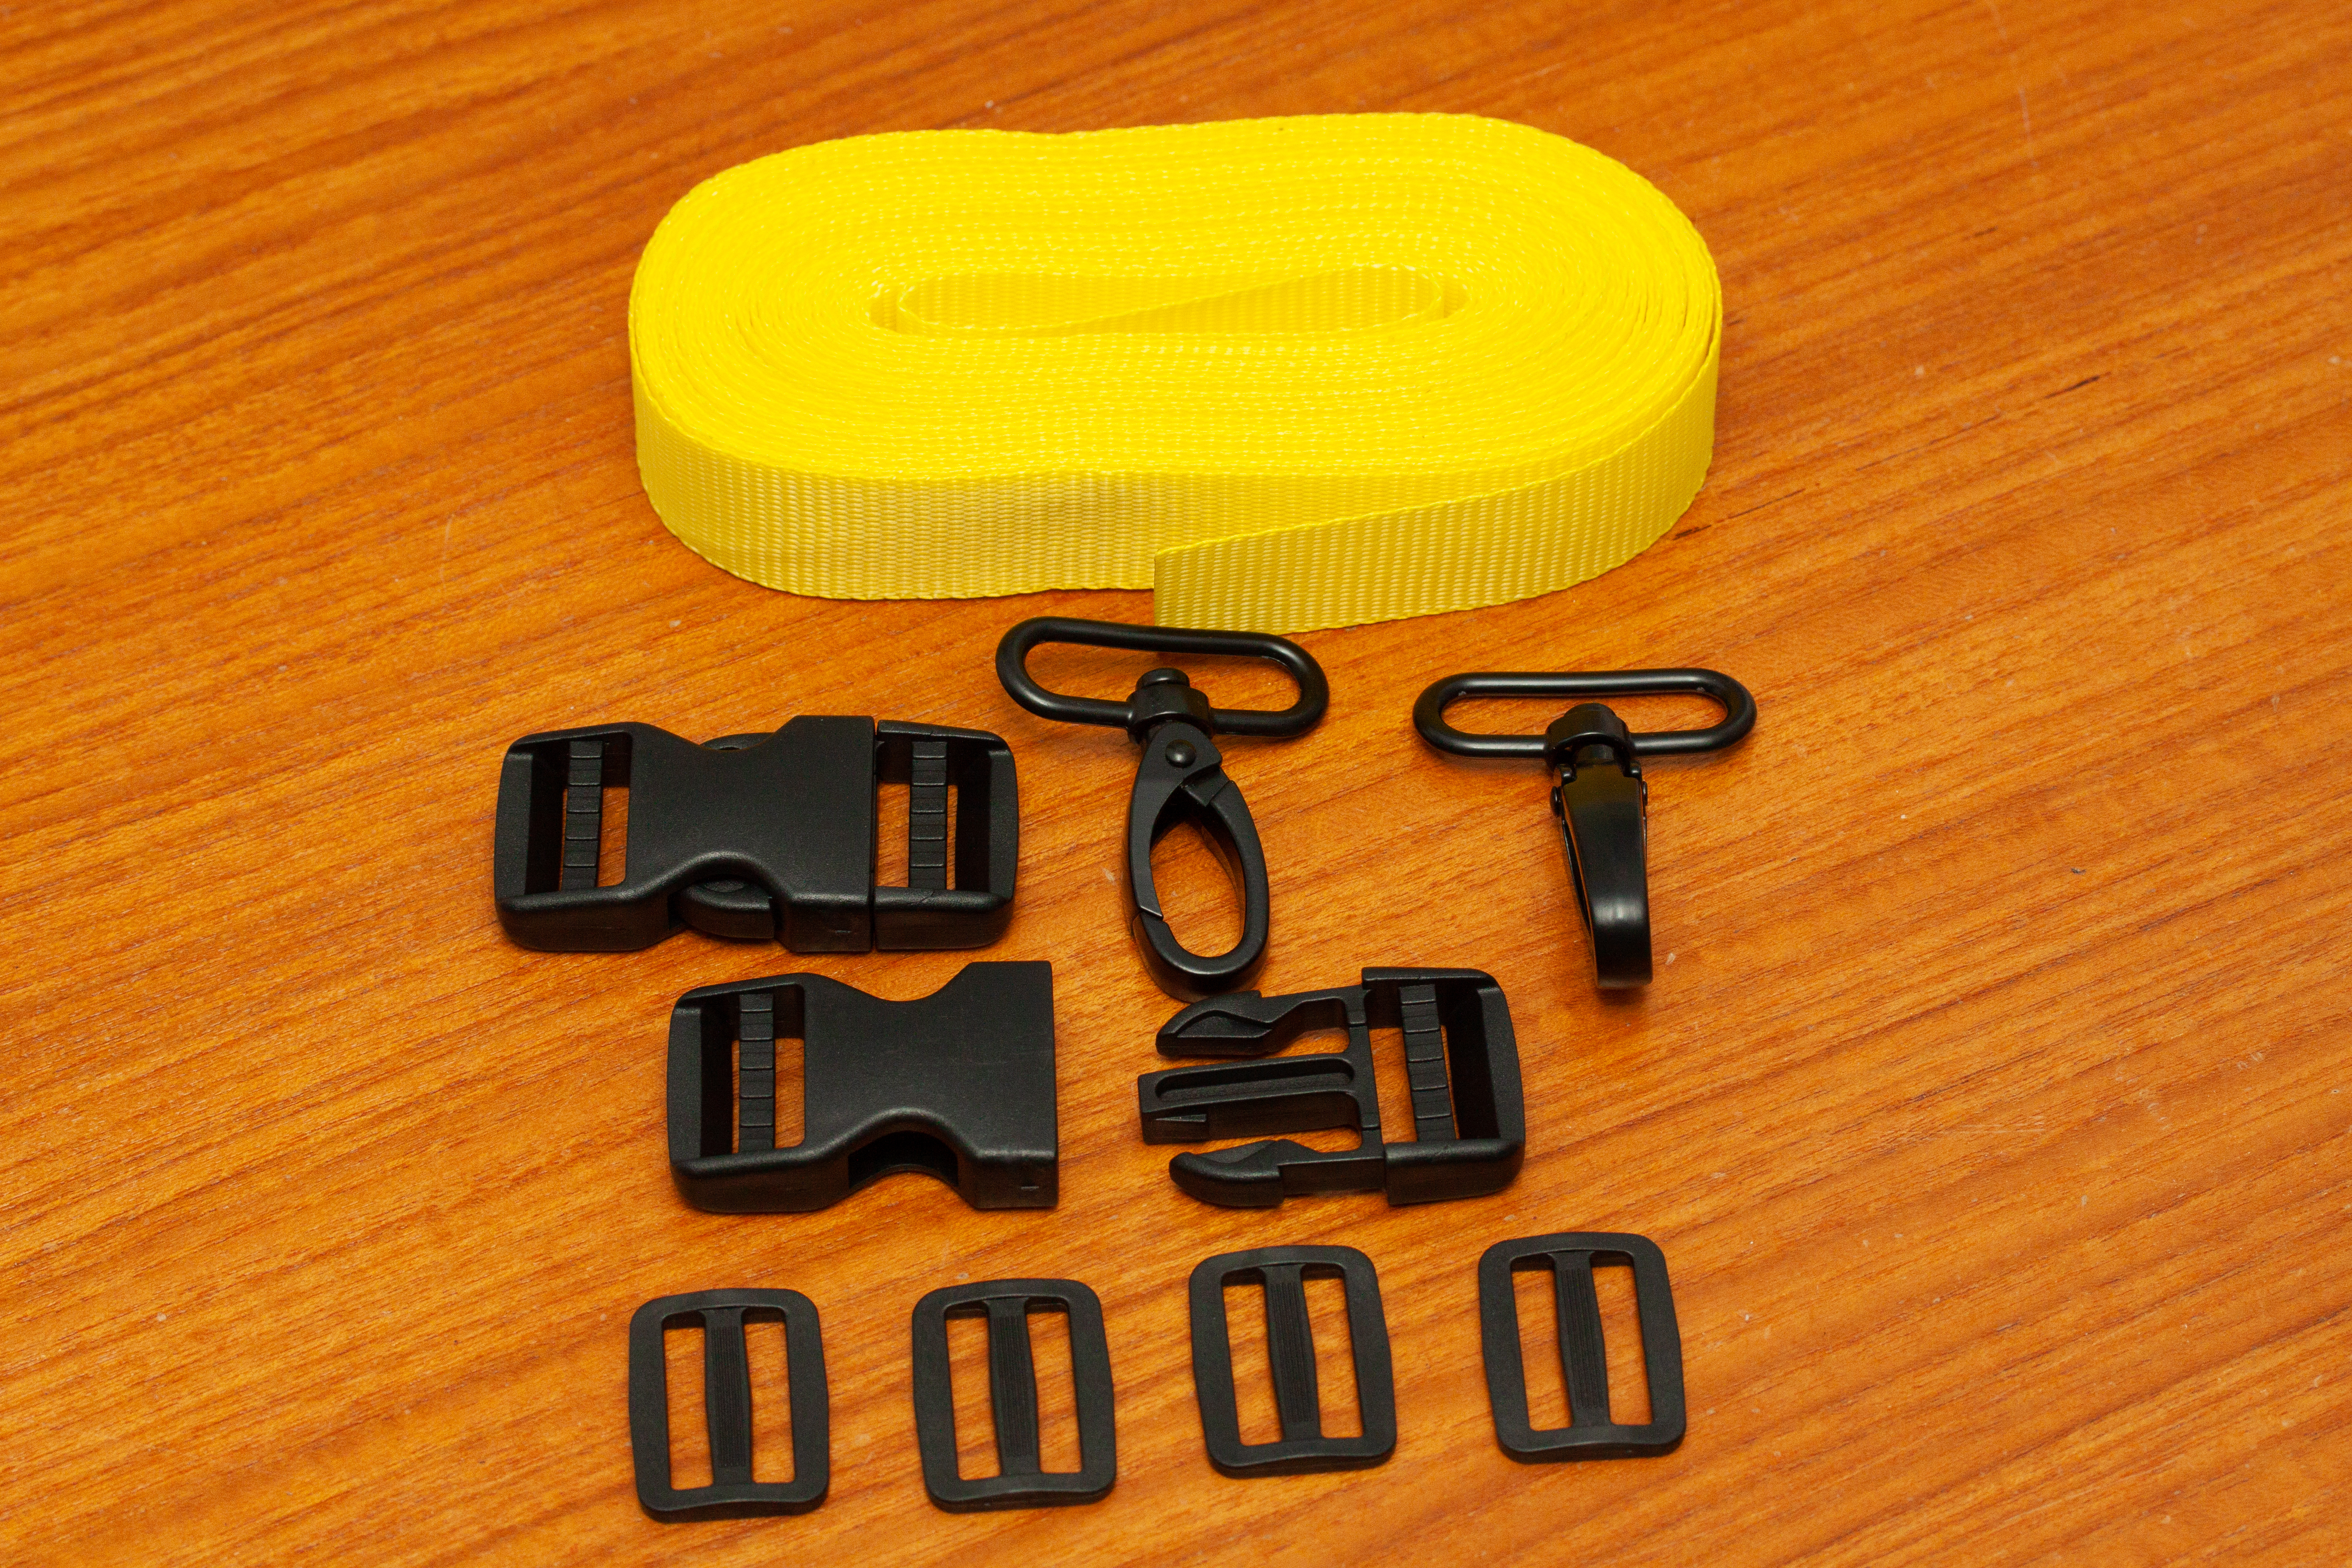
I don’t know what material the metal swivel hook is made from, perhaps its a cast zinc, and it made corrode when exposed to salt water. However it’s been reasonably well coated with an epoxy based paint by the looks of it so it should provide some degree of protection against corrosion. But, I’m sure it will corrode over time, however, when you get 2x for $2 I can’t complain that they’re expensive to replace. The clips and tensioners seem to be a tough/high-impact resistant plastic and feel very rugged.
So the next few steps were made up as I went. I used the components like Lego until I got something that resembled what I was envisaging in my head.
I started with the half that would stay attached to the camera.


This took probably about 20-30 minutes to make. There was a bit of trial and error with resizing and positioning the accessories, but it was pretty straightforward.

Cutting the webbing requires a sharp pair of scissors. Also, I found cutting slowly worked best and prevented excessive fraying. Once cut, I used a flame to melt the cut end to prevent further fraying. I found that there is a Goldilocks-zone with the naked flame; too little flame/heat and the webbing still frays but too much and it burns, goes brown, makes blobs and curls up. Anyway, it takes a bit of practice, but being gentle and patient gets a good result.

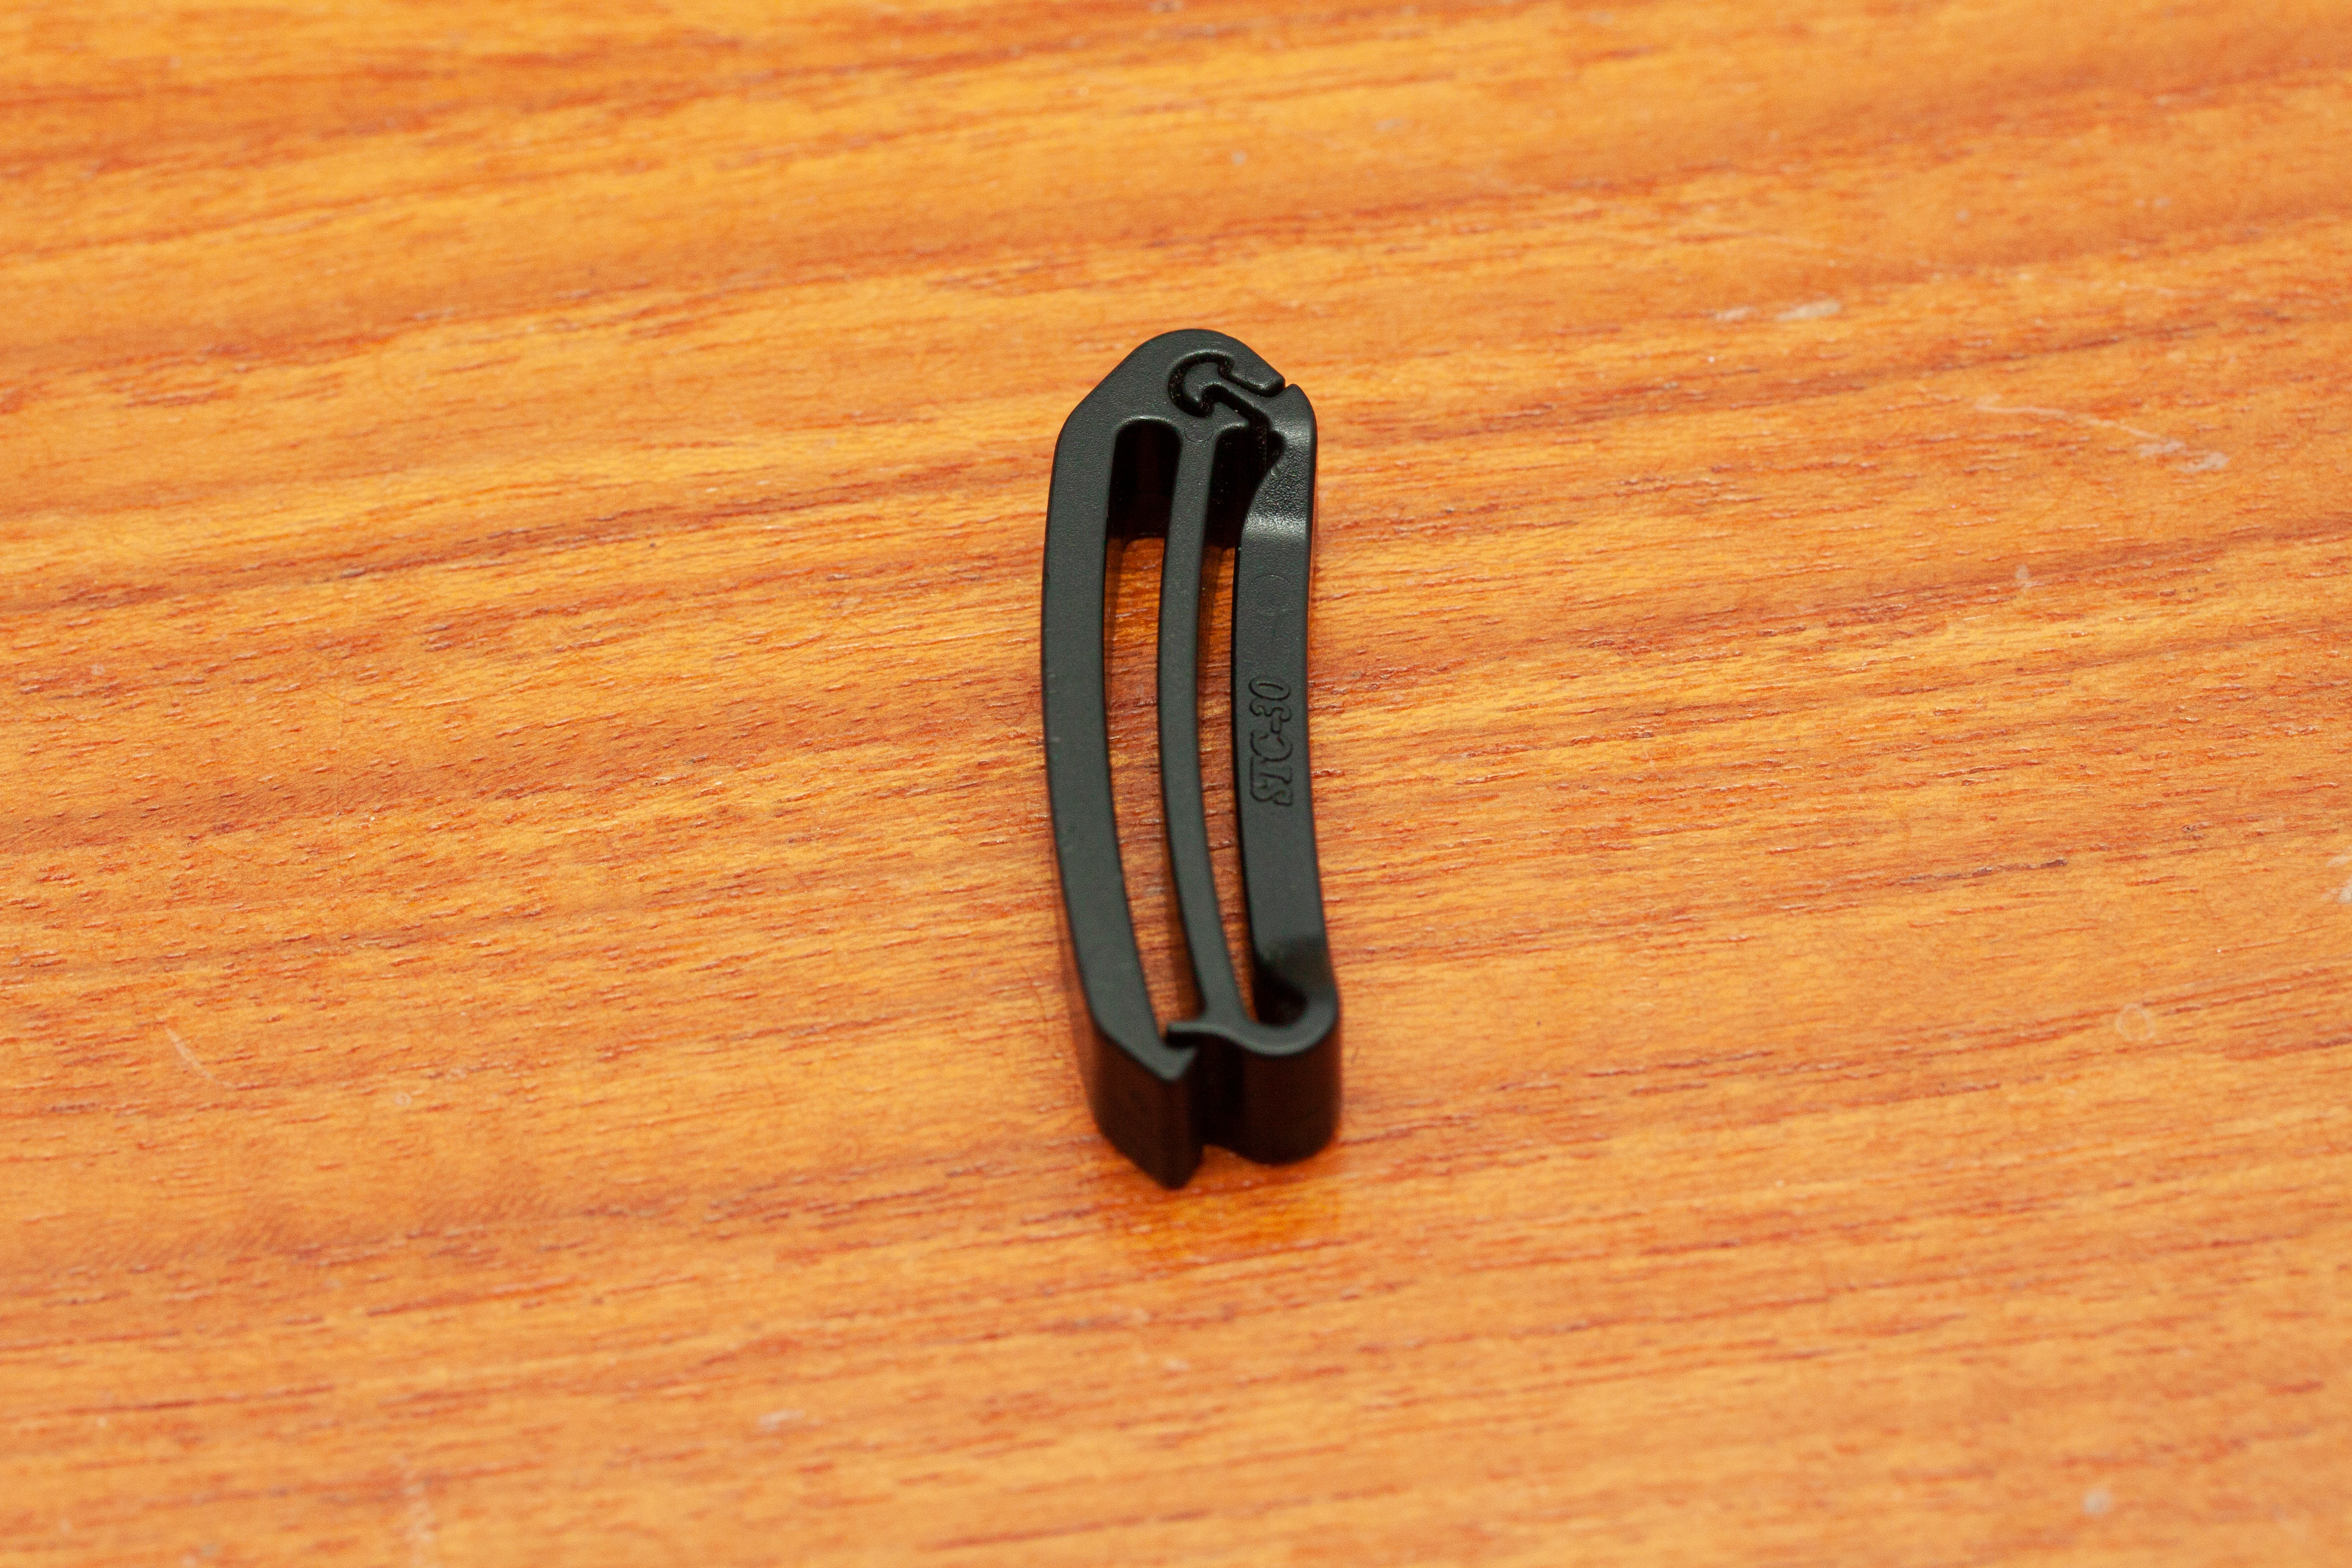
For the second half of the leash that goes around my wrist I got thinking that I wanted some sort of way for the leash to cinch itself up. Its really hard to describe in words what I wanted and how it works, but hopefully the pictures convey what I wanted. I don’t know what to call or how to describe this piece, but I salvaged it from a shoulder bag that had a heap of 25mm straps on it. Don’t worry about the ability for the part to separate itself, the purpose of this piece is that it holds two pieces of webbing parallel and close together.
Another last minute feature I included was adding the second metal swivel hook to the wrist leash. The purpose of this is that I can clip the leash to the BCD if I need to free my hands at any stage and the camera won’t float away. Hopefully the next series of pictures that detail the assembly show how it works. (I did change how the ends of the webbing was looped through the swivel shackle so, if you spot the discontinuity in the threading sequence, that’s why.)


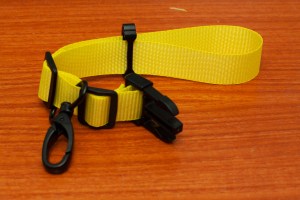
The finished product all clipped up and ready to test.

But the ultimate test is, whether the leash will keep the camera secure to my wrist?
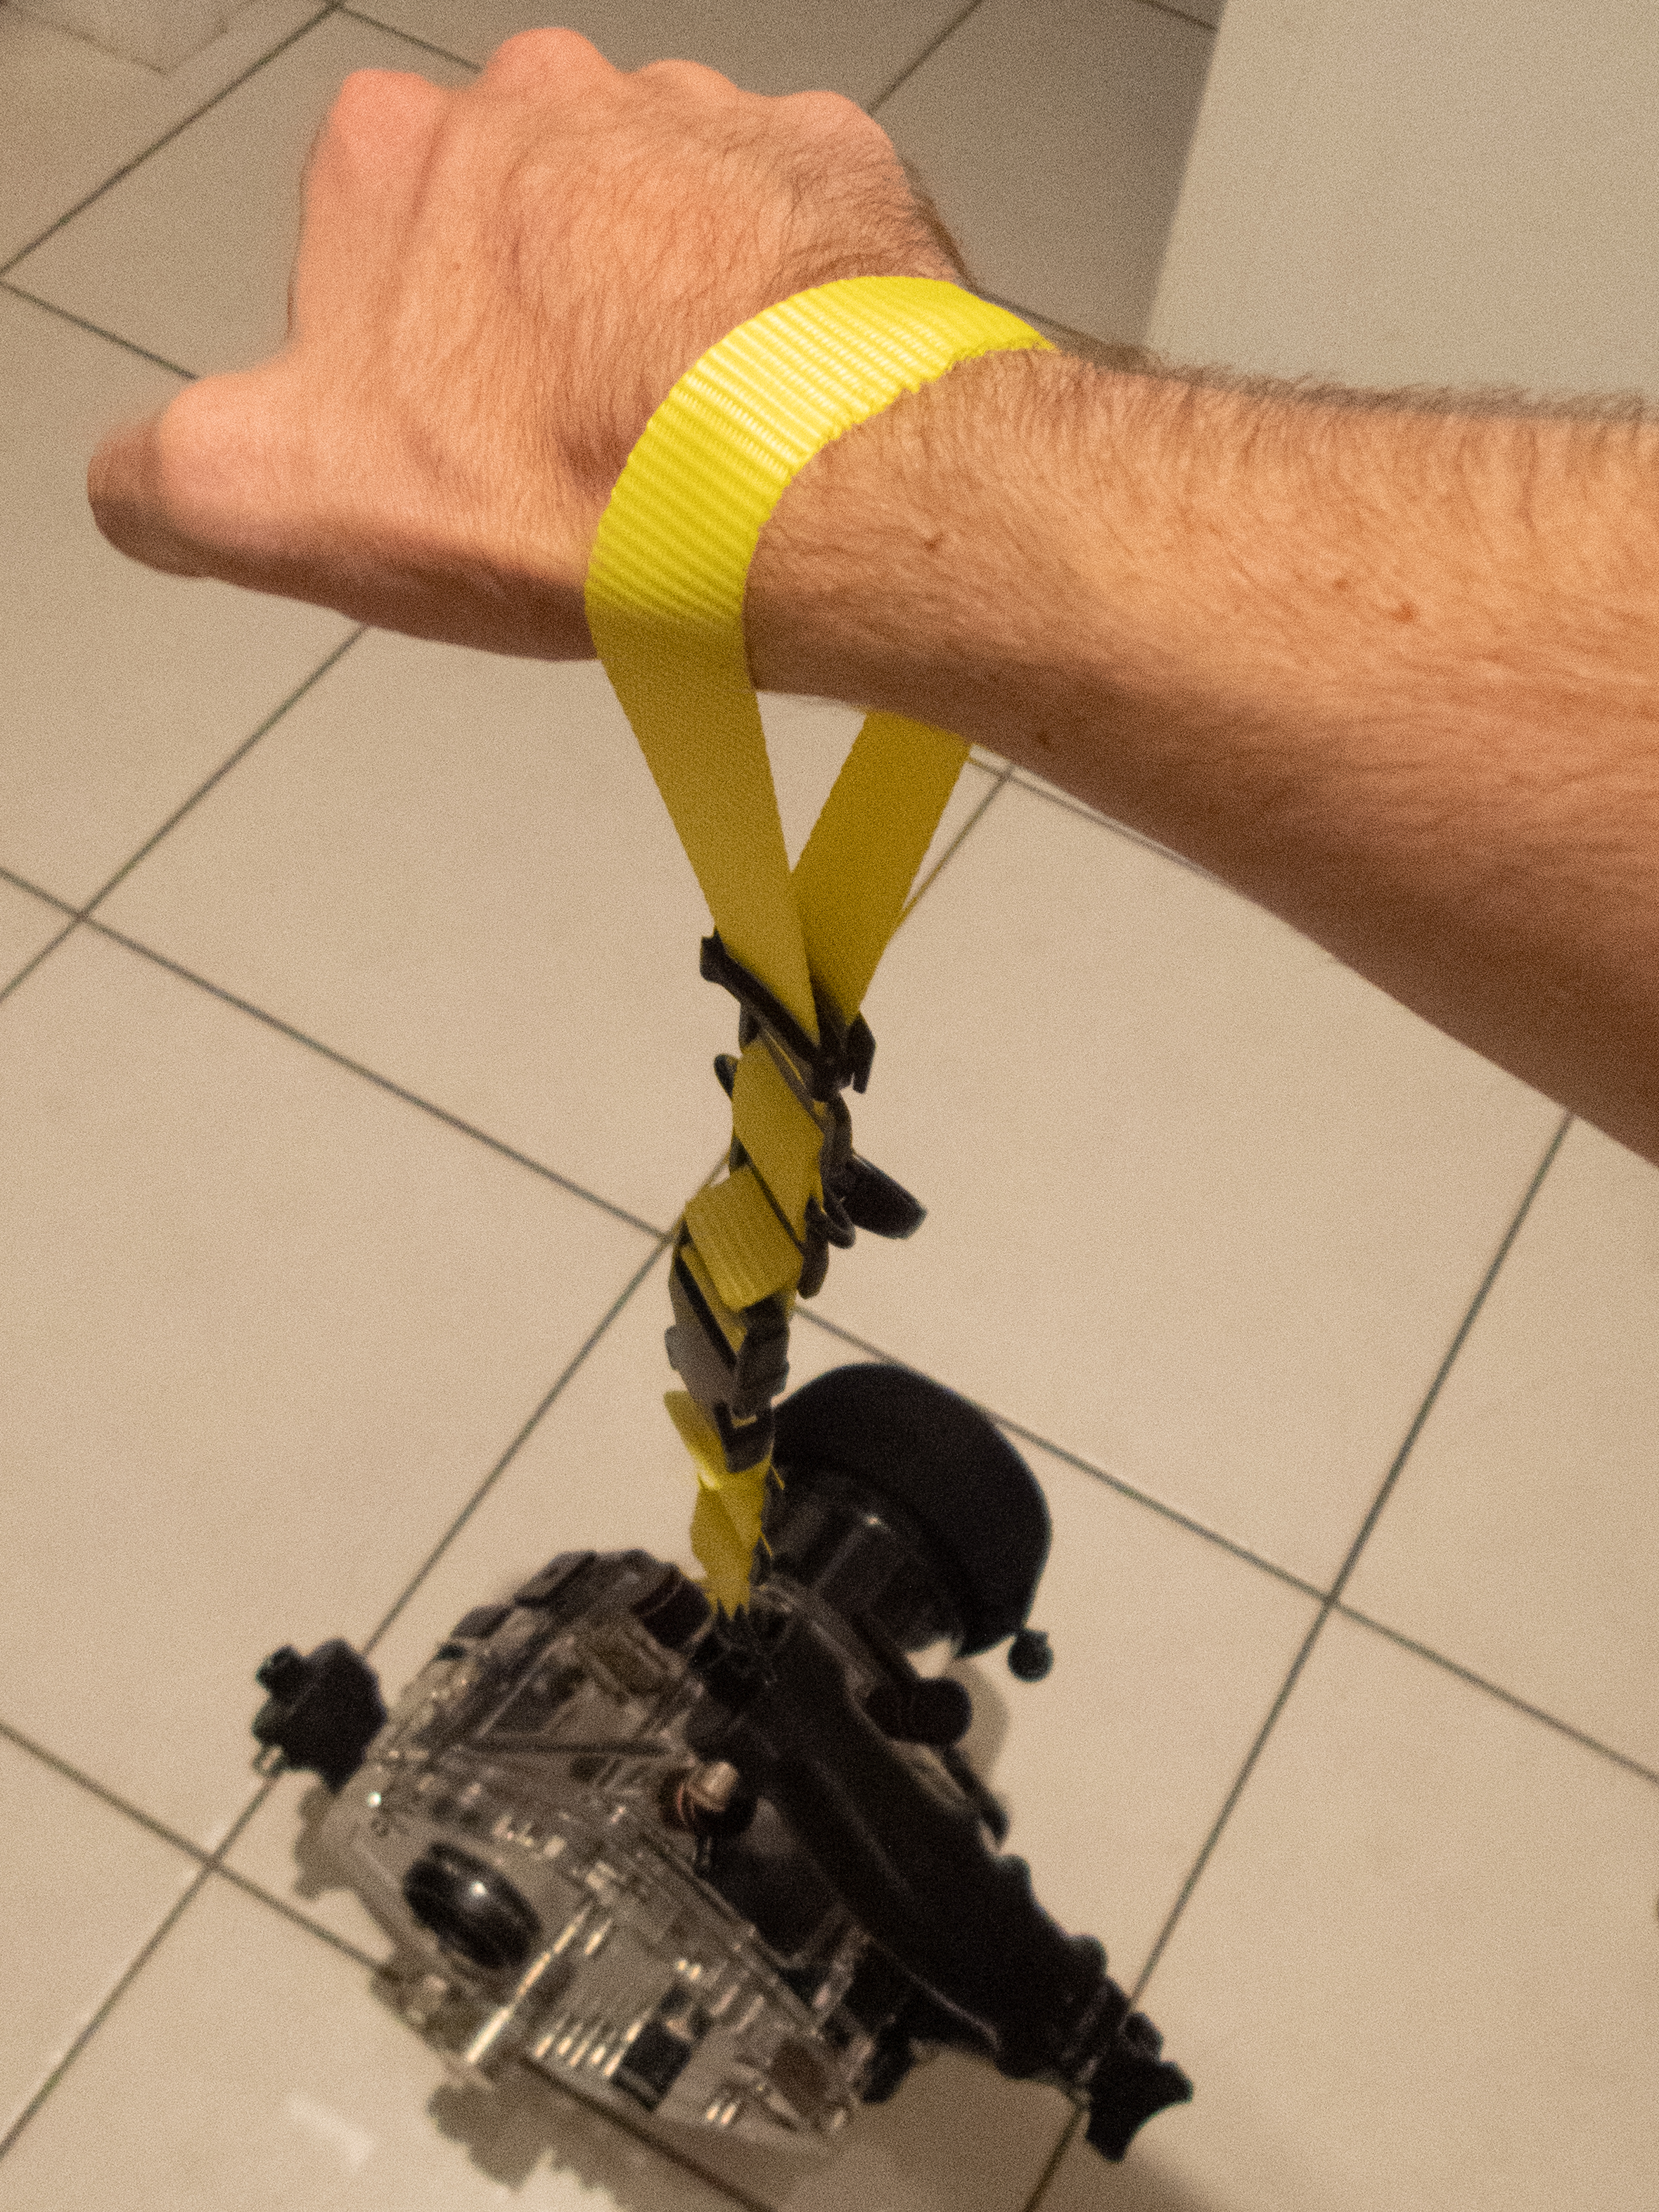
To test if the clips will hold up to some tension, I supported the whole housing just off the floor and it felt secure. (I wasn’t going to hang this thing a metre from the ground and potentially damage the housing before I’ve been able to properly use it 🙂 ).
All up, this took about an hour to make and hopefully it is a useful enhancement to my underwater camera.
I’ll definitely remember to use this webbing and the different accessories int eh future because they are quite cheap and seem pretty versatile.
I did notice that webbing did seem to want to slip through the tensioners if there was no tension on the webbing. This may become worse when wet because the water may act as a lubricant. What this means is that it may undo itself which is bad. However, this can be fixed by doubling over an end of the webbing and then putting a line of stitching perpendicular to the length of the webbing. The doubled up webbing will act as a stop and prevent it from pulling through. But I’ll see how it goes.
Thanks for following along and let me know if you have other suggestions for securing your underwater camera when underwater.
