Overview
A useful tool for your electronics workshop are test leads with IC test hooks and banana plugs.
IC test hooks are great for probing small leads that are in difficult areas. Additionally, their insulated body is great when there are many other wires in the way and alligator clips would short out on other components. Also, because of their spring loaded hooks, they free your hands up.
Having a banana plug at the other end allows you to connect the test leads to a regular multimeter or into a lab power supply.
Banana Plugs Assembly
IC Test Hooks Assembly
Required Components
- IC Test Hooks
- Banana Plugs
- Flexible Hookup Wire – at least 1 metre of wire per test lead
- Solder
Required Tools
- Safety glasses
- Wire cutters
- Wire strippers
- Small flat blade screwdriver
- Small drill bit – optional
- Cordless drill – optional
- Soldering iron
- Blu-tac
Assembly
The components you use are most likely to be different but the construction techniques are the same.
Banana Plugs
Remove the pins from your banana plugs. A small screwdriver is useful for un-clipping the retaining tab.
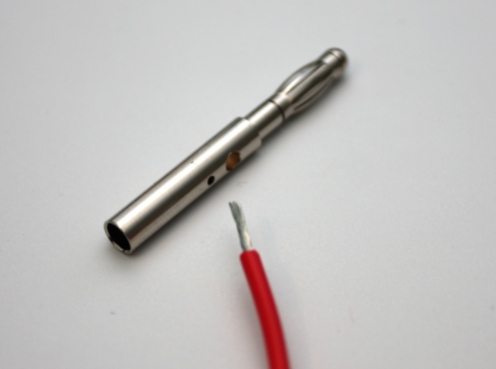
Most stackable banana plugs have two holes. A small hole for the conductors to be soldered, and a larger hole that is used to loop the wire through for restraint. Sometimes the hole that the wire loops through is slightly too small. A drill bit of the same diameter of the hookup wire should be used to enlarge the hole.
Pass the hookup wire through the large hole and then create a loop in the wire. Next carefully insert all the wire conductors into the small hole for the wires. Gently pull the hookup wire back through the hole. Flatten the conductors against the banana plug. Try to make as flat as possible as this helps re-assembly.
Soldering the conductors to the pin can take about a minute. The large pin acts as a heatsink so it will take longer for the pin and conductors to get hot enough for the solder to melt. Another banana plug socket is a really useful way to hold the pin in position whilst you are soldering. Remember, the pin will remain hot for a few minutes.
Once all the soldering is complete, re-assemble the banana plugs. Firmly push the pin back into the plastic housing and close the retaining clip.
Once complete, assemble the IC test hooks.
IC Test Hooks
Most IC test hooks that require assembly are made of two pieces. The main body with the hook and a cover that you press on to reveal the hook. Within the test hook’s body, you’ll see a small tab with a hole in it, this is used to solder the wire to the test hook. Also note that the body and cover separate when gently pulled apart.
Once separated, pull the hookup wire through the hole at the top of the plug. Pull through a good 10 cm of wire. Once pulled through, strip back about 4 mm of insulation.
Carefully insert the wire through the small hole in the test hook’s solder tab. Insert the wire from the side opposite the wire opening, this helps the hookup wire form a small bend at the top of the test hook. Flatten the conductors against the solder tab and solder. Avoid using too much solder as it will creep up the hookup wire and make it stiff. Some Blu-tac is really useful for holding everything still whilst soldering.
Gently pull the hookup wire back through the IC test hook’s cover. Carefully guide the two pieces back together and make sure they are correctly aligned. When pushing the two halves together, you need to gently pull the hookup wire back through the hole also.
Repeat for any remaining wires and you are done.


This work is licensed under a Creative Commons Attribution-ShareAlike 4.0 International License.


Thank you for sharing all these
LikeLike
Thanks for your feedback,
LikeLike