
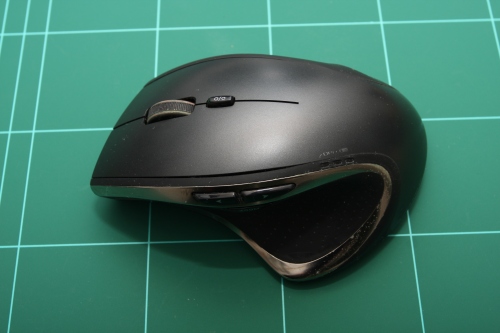
Just the other day my trusty Logitech Performance MX wireless mouse began a nasty habit. This nasty habit began as an annoyance one day and then had snowballed to all out rage two days later. What was the problem? Single left clicks had become double clicks. After 6 years of service, the left click button had finally failed and was getting stuck.
Not wanting to replace an otherwise perfectly good wireless mouse this was a good opportunity to teardown and hopefully repair.
Getting into the mouse requires removing the nylon feet on the mouse’s underside. Behind the nylon feet are four small philips head screws.Take extra care when removing the feet to avoid peeling the nylon from the sticky backing. You want to ensure the sticky backing remains clean so put in a safe place upside down.

The two halves of the case easily separate with only 1 internal plastic clip situated under the thumb rest.

To my surprise there was more hardware internal to the mouse than I was expecting.
The mouse button limit switches looked surprisingly similar in size and shape to other computer mice that I’d pulled apart. Perhaps there is some defacto standard?
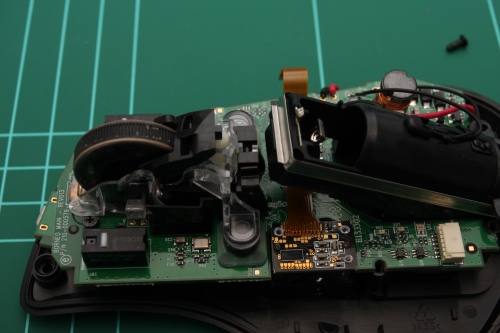
The limit switches are made by OMRON and have a part number of D2FC-F-7N.
Removing the main circuit board from the mouse is tricky. The main trick is removing the scroll wheel assembly – but there are no screws. To remove the scroll wheel assembly, there is a locking pin that has to be removed which is rather unique.


Once the scroll wheel assembly is out, remove the 8 small philips head screws and the flat flex ribbon cable. Slide the tab on the flat flex connector upwards to remove the ribbon.


Do not lose the two small springs that are at the front of the mouse.

Once all the screws, springs and flat flex ribbon cable are removed, wiggle the circuit board out.

Inspection of the underside reveals that there is an Atmega324PA microcontroller running the mouse. For bluetooth wireless communications, there is a Nordic NRF24L01 chip with trace antenna. This chip was quite popular a few years ago, even Sparkfun made a breakout board for the chip. Lots of testpoints and 3 pin ICs, probably transistors. The switch beside the Atmega324 is the power switch.


On the topside of the board there are 2 large ICs, many smaller ICs, a good sprinkle of discretes and a rather large inductor. Within the battery housing is a thermistor which would prevent battery over-temperature.
The largest IC labeled HA574 is an Octal Edge-Triggered D-Type Flip-Flops. I suspect this is used to count the pulses from the scroll wheel’s photo transistor. The smaller IC has a generic number but would be a Ni-MH battery charger chip that works with the large inductor to recharge the internal battery.


To repair the faulty switch an old serial port mouse was sacrificed. Sorry to any Commodore fans out there if this sacrifice is a tragedy. I did do a quick check on eBay and the mouse didn’t seem to be collectible.

Within, was a single chip solution, three switches and a good old mouse ball. Who misses cleaning the lint from their mouse? As I suspected the mouse button switches in the MX looked almost the same size and one was removed with some solder wick. Some quick terminal checks with a multimeter confirmed that the switching polarity of the two switches matched.

Removing the faulty left click button from the MX was more troublesome. Solder wick wouldn’t completely absorb the solder. A solder sucker was no use either. Finally I had to resort to using a small flat blade screwdriver to slowly prise the old switch out whilst heating the solder. This process must be done slowly because it is easy to overheat a PCB and tear traces or even worse, pull the via out. Once removed, replace with the new switch and solder in place.


Take your time re-assembling the mouse, basically follow the dis-assembly steps in reverse. However, here are a few things to remember:
- 2 springs for the scroll wheel
- scroll wheel assembly is secured with the locking pin
- reconnect the flat flex ribbon cable
- keep the battery removal tag clear when installing the battery housing screws
- Make sure the power switch mechanism on the bottom half of mouse body and switch on the bottom of the PCB mate correctly
- 8 screws need to be installed to secure the PCB and battery housing
- small plug for the top half of the mouse body needs to be plugged in to the PCB
- 4 screws hold the two halves of the body together
- slowly replace the nylon feet and give them a good press back into position
Overall, the MX works perfectly again with its donated switch. The clicking action with the new switch feels different and a bit clunky, but that is due to the differences in switches. Its possible to buy replacement D2FC-F-7N switches on eBay and have them delivered for a couple of dollars. But, if you are in a pinch, you may be able to reuse the switches from an obsolete mouse.

Brilliant guide, thanks a lot!
LikeLike
No worries 🙂
LikeLike
Interesting content buddy, keep updating your blog
LikeLike
anybody know what size are the screws i lost them 😦
LikeLike
Very good instruction. I did the repair of my mouse today. My changes:
1. I bought the Omron switches on ebay as spare parts for a few Euro.
2. I opened the soldered switches with a small screwdriver and then removed the plastic parts with a sharp pair of pliers. Then there are 3 solder tabs left, which can be easily removed individually.
LikeLike
Thanks for the feedback
LikeLike
Could you possibly measure the capacitance of capacitor c30? It is on the backside of the PCB near the NRF24 IC. I got a little carried away trying to unsolder the switch and have lost the little guy.
LikeLike
Thank’s very helpfully!
LikeLike
Just replaced the microswitch in my mouse following these instructions. Thanks a lot! Note that there are new pads available from ebay relatively cheaply, I didn’t fancy trying to stick the old ones back on.
LikeLike
Hi, I have three of these mice and love them. I would be willing to pay someone to do the work as I suck at soldiering. If you are interested please email me Lorne at Electric Cow dot com. Thanks
LikeLike
These detailed pictures and instructions are fantastic – gave me the confidence to replace the microswitch on my Performance MX after 11 years of service. £1.19 for 2 new switches from ebay, and some careful soldering and it’s all working good as new. So many thanks!
LikeLike
No worries. I’m amazed people still use this blog and fund it helpful
LikeLike
Thank you so much for this guide! I will try and find the OMRON switches online and do the repair, as I’ve had this exact same issue with my MX mouse for quite some time now, and it’s soo frustrating when it double clicks <:( Thx again!
LikeLike